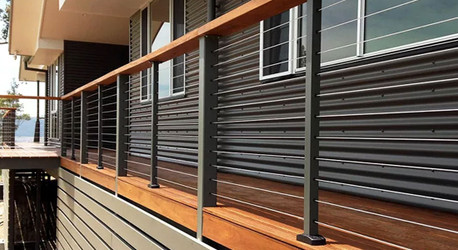
How To Install Wire Balustrade
Posted by Chain Direct on 13th Jan 2022
Stainless steel wire balustrade is a popular way to create a stylish finish around areas like decking and patios. Our wire balustrade kits come in a range of sizes and include everything you need for the job making it easy to install.
If you’re thinking about installing wire balustrade at your property, here’s a quick guide on the steps to complete your DIY installation job.
To install your balustrade wire, basically all you will need is a tape measure, a drill, wire rope cutters, some hand tools and a swage tool if you are using swage fittings.
For most DIY balustrade wire installations, we recommend using our 3.2mm 7 x 7 stainless steel wire rope, as this has enough flexibility needed for looping the wire around thimbles and clamping with wire rope grips. The 1 x 19 strand wire rope is more suited for use with swage terminals, so additional tools are required if you are planning to use this wire.
The first step is to plan where you are going to run the wire and how you are going to secure each end. Stainless steel balustrade wires should normally be spaced at a maximum of 80mm apart, provided the distance between the intermediate posts is no greater than 1200mm. So, look at the overall length you need to have for each run, how many posts you need to run the wire through and how many runs you will need to make.
If you have corner posts to your balustrade area, it’s important that you do not bend the wire around corners. Doing this can damage the balustrade wire and place excessive stress on the anchor posts. Additionally, it will make correctly tensioning the wire very difficult, and usually result in uneven tension along the length of the wire. This is also not compliant with the building code requirements.
Now that you’re ready to begin, you can mark out where you will mount each wire run and where you need to drill the holes to pass the wire through each post. It is recommended to drill 4mm holes on each post where you will pass the wire through. Be sure to correctly align and mark these prior to drilling. If you are using grommets in the posts, a 7.5mm will be required.
To install the end fixings, mark and drill the necessary holes on the end posts in order to screw the saddles into timber anchor posts. If you have steel posts, we suggest you use self-tapping screws or rivets to attach the saddles to the post.
Once you have the holes ready, you can measure and cut the wire run and create one end loop using the thimbles. Be sure to cut the wire slightly longer than your actual length so you have enough wire to complete the loop and attach the clamp. Using wire rope clamps makes this process easier as you don’t have to be precise with your measurements compared to using swage fittings, as the clamps allow you to adjust the length of the wire if you find you have too much wire in the run after cutting.
Set up one end loop of the wire run, then feed the wire rope through the holes in each post and set up the end loop on the other end of the run. You can now connect these to the saddles and secure in place. One end of the run should have a turnbuckle fitted to allow for the proper tensioning of the wire run.
Be careful not to over tension the wires as this will put excessive strain on the anchor posts and mounts.
Take your time with the first couple or runs, and once you have your process for creating each wire you will soon have the job completed.
To make the process of selecting the right balustrade kit for your DIY project, we have a wide range of balustrade packages that include everything you need to set up and create your wire balustrade.
So check out our range of balustrade kits online and save.

